To set up video creation, we first define our content goals and audience. Next, we storyboard our concepts for visual flow, then develop a script that clearly conveys our narrative. Location scouting is key for ideal filming environments, followed by rehearsing to guarantee a smooth production. Mastering lighting and capturing high-quality audio are essential techniques to enhance our visuals. Finally, the editing process refines our video before exporting it for our audience. Keep going, and we’ll provide more insightful tips!
Key Takeaways
- Define your content goals and target audience to tailor your video creation process effectively.
- Develop a structured narrative through storyboarding and scripting to create engaging and coherent videos.
- Scout filming locations and choose the right filming space to ensure optimal shooting conditions and effective storytelling.
- Master lighting and audio techniques to enhance video quality and maintain a professional standard.
- Organize footage, edit effectively, and export in the appropriate formats to ensure your video reaches your audience smoothly.
Defining Your Content Goals and Audience
When we think about creating video content, it’s crucial to start by defining our content goals and understanding our audience. Knowing our audience demographics helps us tailor our videos effectively. Are we targeting Gen Z or millennials? Their preferences will differ markedly. For instance, younger viewers often enjoy short-form videos that deliver crisp, engaging messages.
Next, we should consider our content preferences. Are we focusing on brand awareness or lead generation? Different video types serve distinct purposes: explainer videos can engage viewers at the top of the funnel, while product demos can build trust mid-funnel. With a goal-driven approach, we can maximize our video marketing impact and guarantee our messages resonate with viewers.
Storyboarding Your Video Concepts

After we’ve pinpointed our content goals and understood our audience, it’s time to bring our video ideas to life through storyboarding. Let’s start by creating a frame layout in a grid format, where each box holds a scene’s visual representation. These frames help organize our video’s sequence and should be labeled clearly for easy reference. We’ll add action notes to describe movements, and dialogue integration below each frame to sync audio with visuals. Each frame should represent key cinematic elements like lighting and color, ensuring our story flows logically from beginning to end. By carefully planning sequencing flow, we can catch any confusing shifts before production, making this process both essential and exciting for our video creation journey! Additionally, incorporating Dynamic Stability Control in our storyboarding process can enhance the overall viewer experience by ensuring smoother transitions.
Script Development for Structured Narratives
In order to craft a compelling video script, we need to establish a structured narrative that keeps our audience engaged from start to finish. Using narrative frameworks like the three-act structure or Dan Harmon’s Story Circle, we can plan our story’s setup, confrontation, and resolution. This helps clarify character motivations and enhance thematic depth.
We should introduce the central conflict early and raise narrative stakes to maintain tension, making our audience deeply invested. Developing multi-dimensional characters with clear goals adds rich emotional layers. By addressing both internal and external conflicts, we create relatable scenarios that resonate. Finally, reinforcing our core themes through character arcs and dialogue guarantees coherence, enriching the viewer’s experience while driving our video’s message home. Moreover, just as motor timing optimization can significantly improve performance in RC racing, careful script adjustments can elevate the overall impact of our video.
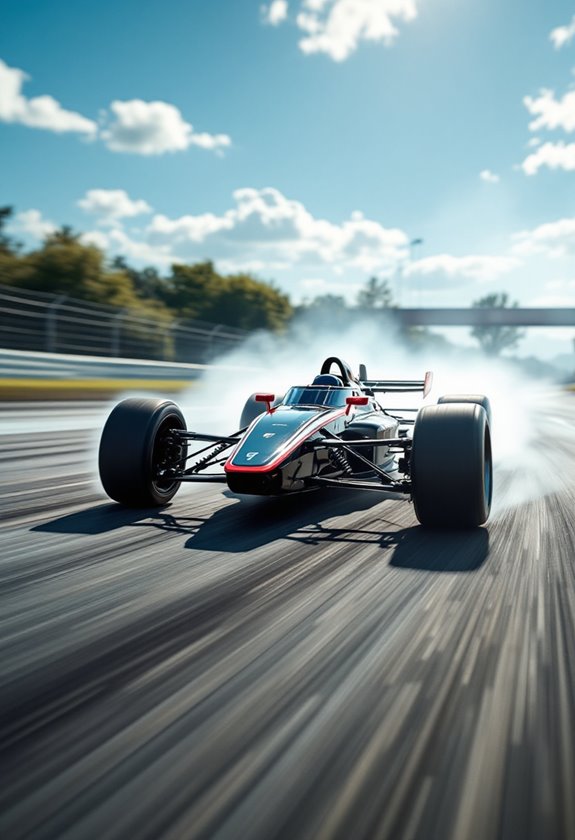
Location Scouting for Optimal Filming

Location scouting is an exciting step in the video creation process, as it sets the stage for our story to come alive. We need to evaluate the location characteristics that align with our script, incorporating scenic variety to match our narrative. While assessing environmental factors, let’s monitor timing challenges like traffic and natural lighting during our planned filming times. We’ll also examine technical requirements, ensuring there are power sources and ample space for camera setups. Logistic planning is key, so we’ll check for accessibility considerations and nearby community interactions that may affect filming. Using scouting tools like apps can streamline our process, allowing us to visualize shots and document essential details to make informed decisions for our location. Additionally, considering the use of organized storage can help keep all filming equipment in order during the shoot.
Rehearsing for a Streamlined Production
Rehearsing for a streamlined production helps us transform our vision into reality. With effective rehearsal techniques, we can refine performances, ensuring everyone knows their roles and timing. Thorough rehearsal scheduling is essential; we should plan sessions to cover each scene and component without rush. By including run-throughs, we familiarize our team with entrances, exits, and blocking. This preparation helps us eliminate confusion during filming. We can also conduct tech walkthroughs to test equipment and refine audio and visual elements. By recording and reviewing rehearsal videos, we’ll spot needed adjustments and improve our production quality. Additionally, incorporating user-friendly designs into our tech setup can further enhance the overall efficiency of our production process. Let’s work together to make every rehearsal count and set our project up for success!
Choosing the Right Filming Space
Choosing the right filming space is essential for any production’s success, and there are several key factors to take into account. First, we must consider the production layout. We need enough room for cameras, talent, and equipment. Soundproofing techniques, like foam panels, help with noise control, ensuring clear audio. When choosing backdrop selection, think about versatile options that enhance visual appeal without major changes. Lighting setup is equally important; natural light is great, but we often rely on softbox and LED panels for consistency. Ultimately, we should optimize the space for equipment accessibility, making sure our gear is easy to set up and move around. With careful planning, we can create a filming space that truly shines! Additionally, ensuring moisture protection for equipment, like using waterproof seals, can safeguard against unexpected spills during production.
Designing an Effective Set
Designing an effective set isn’t just about looking good; it’s a crucial element in storytelling that enhances our production. We need to focus on set authenticity by analyzing the story’s time period and socio-economic context. Visual coherence is essential, as a consistent color palette reinforces the emotional response we want from our audience. Practical arrangements should prioritize character interaction and guarantee narrative support. We must also consider lighting impact, using soft light to eliminate harsh shadows and enhance textures. While budget constraints are a reality, we can creatively use existing locations and multifunctional elements to craft our set. Every choice we make matters, so let’s build a space that truly brings our story to life! Additionally, understanding the importance of maintenance for our set elements can help in preserving their visual appeal throughout the production.
Camera Selection and Gear Setup
When you’re diving into video creation, selecting the right camera and gear can greatly impact your project’s outcome. We recommend mirrorless cameras for their compact size and advanced autofocus. Full-frame sensors shine in low-light and offer amazing depth of field, but APS-C and Micro Four Thirds sensors can be budget-friendly. Pay attention to dynamic range for capturing details in tough lighting. Take advantage of tripod stability for smooth shots. Consider audio quality by using external microphones, which greatly enhance sound. Think about lens compatibility and your preferred video formats and shooting modes. Cameras like the Canon EOS R5 or Panasonic LUMIX S5 II are popular choices that balance features and performance perfectly. Choose wisely, and your videos will shine!
Mastering Lighting Techniques
Mastering lighting techniques is essential for creating stunning videos that captivate your audience. To start, we should embrace a three-point lighting setup, using a key light for the primary illumination, a fill light to soften shadows, and a back light for depth. Combining soft lighting from diffused sources with hard lighting for dramatic effects helps refine our visual mood. Adjusting color temperature in our lighting setup can greatly enhance the mood; warmer tones create comfort, whereas cooler tones mimic daylight’s clarity. Using practical lights alongside ambient lighting enriches our scenes. By controlling lighting quality through diffusion and establishing an ideal lighting ratio, we can achieve balanced illumination that keeps viewers engaged and focused on our message.
Capturing High-Quality Audio
Capturing high-quality audio is just as vital as getting great visuals for your videos. To achieve this, we need to choose the right microphone types—shotgun mics are perfect for direction, while lapel mics work wonders for interviews. Let’s create a sound recording environment by using soundproof techniques like foam panels and closing windows to block external noise. Monitoring audio levels is essential; aim for a range between -10 dB and -20 dB for clarity. We should practice gain staging to prevent clipping and maintain audio fidelity. Finally, guarantee our recording settings hit that sweet spot of 48 kHz sample rate to detail sound. With these tips, our audio can truly shine!
The Editing Process and Post-Production
With high-quality audio captured, we’re ready to jump into the exciting world of video editing and post-production. First, we’ll ingest and organize our footage, tagging it carefully for easy retrieval. This sets the foundation for our editing workflow. Next, we create a rough cut by assembling the best clips to shape the story. During this stage, it’s crucial to sync sound and picture while removing unwanted audio. Once we have our rough cut approved, we refine it into a fine cut, focusing on smooth shifts and finalizing the visuals. After picture lock, we can introduce VFX and make color corrections. By employing these post-production techniques, we’ll guarantee our video is polished and ready for viewers!
Exporting Final Videos for Your Audience
How do we guarantee our final videos resonate with our audience? First, we need to choose the right export formats. MP4 with H.264 codec is often best for compatibility on various online platforms. Our resolution choices matter too—Full HD (1920 x 1080) is perfect for most viewers, while 4K offers stunning quality for specific needs. Bitrate considerations are essential; targeting 20-30 Mbps for HD secures clarity. We’ll also maintain audio fidelity by using the AAC audio codec at a 48 kHz sample rate. Finally, let’s keep an eye on hardware requirements, as powerful tools can greatly reduce export times. By following these steps, we can guarantee our videos connect meaningfully with audiences everywhere!
Frequently Asked Questions
What Budget Should I Allocate for Video Production?
To effectively allocate our budget for video production, we should consider that production often accounts for 50-60% of total costs. This emphasizes cost considerations, including equipment investment, essential for achieving our desired quality and impact.
How Long Does the Video Creation Process Typically Take?
Typically, video creation takes between 2 to 14 weeks, depending on the project’s complexity. We emphasize time management through thorough project planning to guarantee efficient progression from concept to delivery while meeting expectations.
What Common Mistakes Should I Avoid During Filming?
When filming, we often overlook common mistakes like poor lighting and bad camera angles. Let’s avoid overcrowding the frame and inconsistent audio to create clearer, more impactful videos that truly engage our audience.
Should I Hire Professionals or DIY My Video Production?
We should weigh professional benefits against DIY advantages. Hiring pros boosts quality and saves time, especially for essential projects, while DIY can fit smaller budgets. Let’s choose based on our specific needs and goals.
How Do I Measure the Success of My Video?
To measure our video’s success, we should focus on viewing metrics and audience engagement. Even if it seems challenging, analyzing these elements reveals valuable insights that can truly enhance our future content strategies.